> ## Documentation Index
> Fetch the complete documentation index at: https://ui-docs.vibeflow.ai/llms.txt
> Use this file to discover all available pages before exploring further.
# Quick Start
> Create your first UI in under 2 minutes - no code required
## What You'll Build
In this quickstart, you'll create a complete settings page with sidebar navigation, toggle switches, and a profile section - just by describing it.
**No coding experience needed.** VibeFlow generates production-ready React
code from your description. You can refine it later with natural language.
## Prerequisites
* A VibeFlow account (sign up at [ui.vibeflow.ai](https://ui.vibeflow.ai))
* An idea for a UI (or use our example)
That's it.
## Step 1: Describe Your UI
Go to [ui.vibeflow.ai](https://ui.vibeflow.ai) and sign in.
In the prompt area, describe the UI you want to create. Be specific about
layout, components, and interactions.
Try this example:
*"A settings page with a sidebar nav, toggle switches for notifications and dark mode, a profile avatar upload section, and a save button with toast confirmation."*
Press **Generate** or hit `Cmd + Enter` to proceed to the design direction
step. This doesn't generate yet - it takes you to style selection.
 ## Step 2: Choose a Design Direction
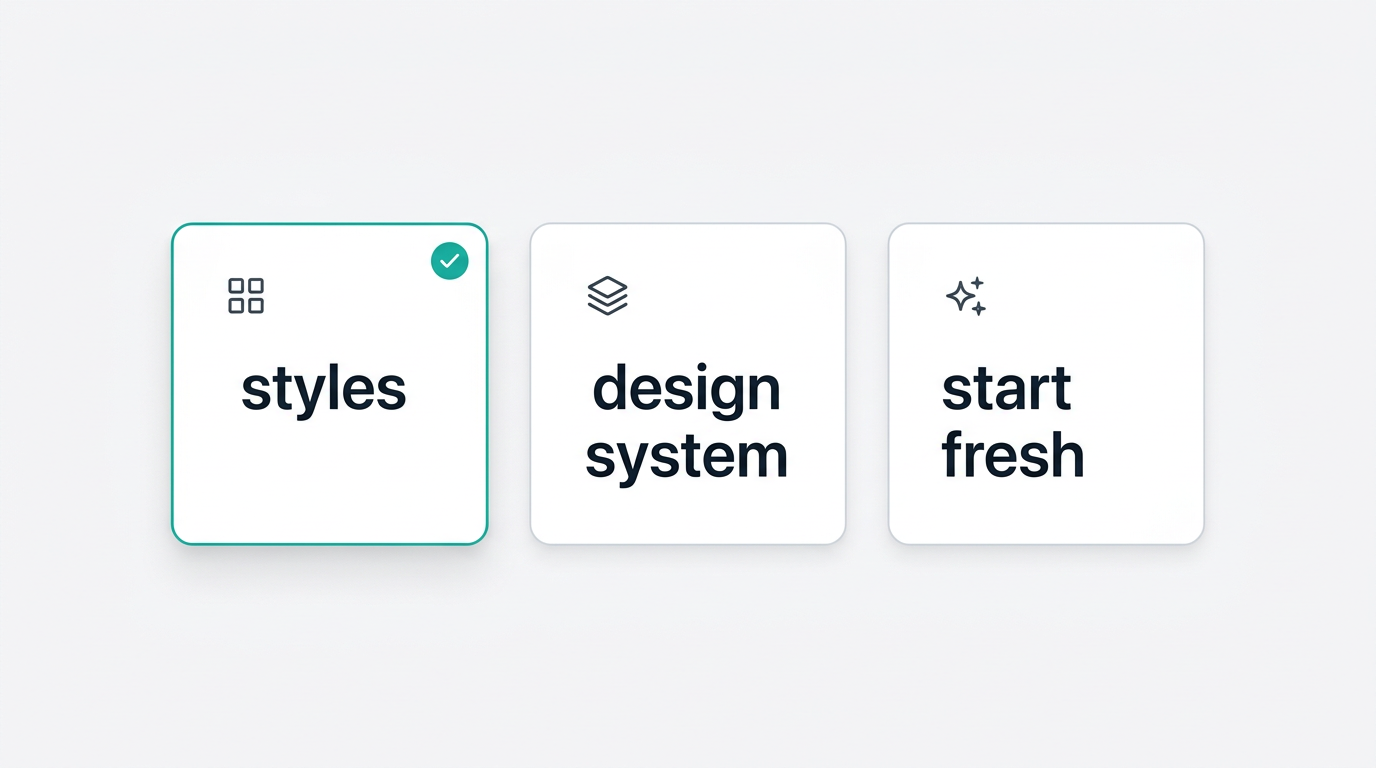
You'll see three visual path cards:
Choose one of:
* **Styles** - Select a visual aesthetic like Glassmorphism or Neobrutalist
* **Design System** - Use an existing design system you've uploaded
* **Start Fresh** - Let the AI choose a clean, neutral style
If you chose **Styles**, click one of the 9 style cards to select it. You'll
see a preview image for each one.
Click **Generate UI**. VibeFlow's AI will create your entire interface.
## Step 2: Choose a Design Direction
You'll see three visual path cards:
Choose one of:
* **Styles** - Select a visual aesthetic like Glassmorphism or Neobrutalist
* **Design System** - Use an existing design system you've uploaded
* **Start Fresh** - Let the AI choose a clean, neutral style
If you chose **Styles**, click one of the 9 style cards to select it. You'll
see a preview image for each one.
Click **Generate UI**. VibeFlow's AI will create your entire interface.
 ## Step 3: Refine in the Editor
You'll land in the editor with your generated UI visible in the preview panel.
Your UI is rendered live in the preview. Scroll through it to see all the
components the AI generated.
Use the chat input to describe refinements:
* *"Make the sidebar collapsible on mobile"*
* *"Change the primary color to indigo"*
* *"Add a search bar at the top"*
When you're happy with the result, click **Publish** in the top-right corner
to deploy to a live URL.
## What You Just Built
You now have a complete, deployed React application with:
* **Responsive layout** with sidebar navigation
* **Interactive components** - toggles, buttons, form elements
* **Clean code** - production-ready React with proper component structure
* **Live URL** - accessible to anyone on the internet
## Next Steps
See all 9 visual aesthetics and when to use each one
Master the chat interface, preview panel, and publishing flow
Turn any existing website into an editable React project
Start from a community template instead of a blank canvas
## Step 3: Refine in the Editor
You'll land in the editor with your generated UI visible in the preview panel.
Your UI is rendered live in the preview. Scroll through it to see all the
components the AI generated.
Use the chat input to describe refinements:
* *"Make the sidebar collapsible on mobile"*
* *"Change the primary color to indigo"*
* *"Add a search bar at the top"*
When you're happy with the result, click **Publish** in the top-right corner
to deploy to a live URL.
## What You Just Built
You now have a complete, deployed React application with:
* **Responsive layout** with sidebar navigation
* **Interactive components** - toggles, buttons, form elements
* **Clean code** - production-ready React with proper component structure
* **Live URL** - accessible to anyone on the internet
## Next Steps
See all 9 visual aesthetics and when to use each one
Master the chat interface, preview panel, and publishing flow
Turn any existing website into an editable React project
Start from a community template instead of a blank canvas